*Note: products listed on Bases Loaded Softball are selected by our softball players, coaches, and team of enthusiast writers and editors. Buying softball products through our links may earn us a commission with no additional cost to you.
Sometimes, we don’t always have the luxury of having other people to practice with. Luckily, there are a number of great drills that will allow you to get out there and improve your softball skills on your own, anytime.
In this article, we’re going to teach you a number of great softball drills to do by yourself. We’ll start with infield catching drills, and then move into a number of great hitting drills to do by yourself.
Here is an example of a great starter kit for hitting and throwing drills with a net you can order online:

Pinty Baseball and Softball Practice Net 7'×7' Portable Hitting Batting Training Net with Carry Bag & Metal Frame + Baseball...
- PERSONAL COACH: Our 7'x7' baseball and softball practice net with starting accessory kit is the perfect training aid you need to improve your pitching, batting, and other fundamentals or for teaching the next generation of great players

If you practice with these drills as much as you can, you’re sure to see some major improvements in your form, technique, and overall skill level. So without further ado, here are the best softball drills to do by yourself!
Infield drills to do by yourself:
Infield Drill #1: Ball handling.
The more time you spend with the softball in your hands, the better you’re going to be at ball handling. Basketball players understand this well, which is why they often do warm up drills in which they move the basketball around their torso and legs using just their two hands. We’re going to run a very similar drill, just with a softball.
This is a great warm up drill, or a drill to run at any time—like when you’re at home watching T.V. or just bumming around the house.
Simply grab your softball, and start moving it in a circle around your torso, so that it goes behind your back, then in front of you, then back around your back again. Keep doing circles with the ball around your torso, switching up from clockwise to counterclockwise, and trying to see how fast you can move the ball without dropping it. If you’re dropping the ball a lot, slow your speed down a bit.
Work your way down your body so that you’re now moving the ball in circles around your legs. Once you’re done that, try doing figure-eights between your legs, just like they do in basketball.
While you’re doing this drill, always focus on keeping your hands soft! Keeping your hands soft is one of the most important skills to have as a defensive player.
Infield Drill #2: The right-left tap tap.
When you’re fielding a ground ball in a game, you don’t just hop up to the baseball or step to it in a lackluster fashion. There is a specific technique to footwork when fielding a ground ball that will allow you to execute with maximum effectiveness. That technique is to step with your right foot, then left foot, into a ready position and catch the ball, then step through with your right leg, putting it across your left, and finally step out with your left foot, bringing it from behind your right leg out in a side-wards kind of stride
as you build momentum into your throw. (This is if you’re a right handed player; if you’re a left handed player, you’ll step with you left foot first, then your right foot).
You also want to make sure that when you’re catching the actual ball, your glove is hanging down between your legs, and slightly towards the leg on your glove side.
In order to practice this footwork, start by getting into a ready position. Do the right-left step, and bring your glove down to the ground and tap it twice on the ground, and repeat. Step out again with a right-left step, bring your glove down and tap it twice on the ground between your legs, and slightly to the side you’re wearing your glove on. As you’re doing this, keep your other hand hovered over your glove on the ground and eyes on where the ball would be.
Keep working on your posture, keeping your butt back, and back straight and on an angle, so that your upper torso is angled about 45° with the ground.
If you do this for long enough, you’ll get a great leg workout, and train your body to have excellent posture for fielding ground balls. This will allow you to field more quickly, effectively, and confidently, and possibly become the best infielder on your team.
For a visual demonstration you can watch this YouTube video by Fastpitch Prep:
Infield Drill #3: The right-left and throw.
This drill will build on the previous drill, so that you’re not only practicing fielding the ground ball, but also getting into the throwing position immediately after.
Start by taking a right-left step (or left-right for left handed throwers), then tap your glove on the ground in between your legs and lightly to the side of your glove hand. Keep your other hand over your glove and pretend as if you just caught the ball off the ground. Then bring the ball into your body as you step through with your right leg moving across your body, followed by your left in a sideward stride. As you’re doing this second right-left stride, bring your arm back with the invisible ball in your hand in the throwing position. You can stop there, or follow through with the pretend throw.
Infield Drill #4: Wall Ball.
This drill is extremely simple in concept, and the name explains it all. Find a wall that you can throw your softball against and then catch. Stand back from the wall enough so that as you throw the ball against it, it can bounce off the wall, hit the ground, and bounce or roll towards you. Make sure you’re throwing the ball low enough on the wall so that it doesn’t bounce off too high.
This will allow you to practice the techniques you learned in the previous drills. Depending on which direction the ball rolls after hitting the wall, you’ll also get to practice fielding ground balls with your forehand and backhand.
This drill will allow you to practice the form and technique you picked up in the previous drills, but with an actual ball!
Infield Drill #5: The momentum drill.
A mistake that many players make when fielding ground balls is running directly to the ball in a straight line. This will put a stop to your inertia, leaving you with no momentum to move with into the throw. What you want to do instead is take a curved path on your way to the ball so that after you field the ground ball, your momentum will cary you through your next right-left step, and follow through into the throw.
Start this drill by placing the softball on the ground in front of you. Then, take three pylons and set them up in a triangle so that they form a diamond shape with the softball. To do this, place one pylon directly behind the softball a few feet back. Then, place the other two pylons to the left and right side of the softball, in the space between where the first pylon and the softball are sitting.
Once all your pylons are in place, start the drill directly behind the pylon that is directly behind the softball. Now you’re going to practice fielding the softball in front of you. But instead of coming directly at the softball, you’re going to step around one of the other two pylons on your left and right, so that you make a ‘C’ shaped curve around the pylon to the ball. Once you get close to the ball, do your right-left step to get into a good fielding position, and pick up the ball. Then, step through with another right-left step as you follow through with your momentum into the throw.
If you need some pylons to use at home Amazon carries some cheap and durable pylons available in multiple colors for different sets of drills – we prefer the short sports style vs. the long construction cones for our drills as they have a smaller profile and are less likely to get in the way:
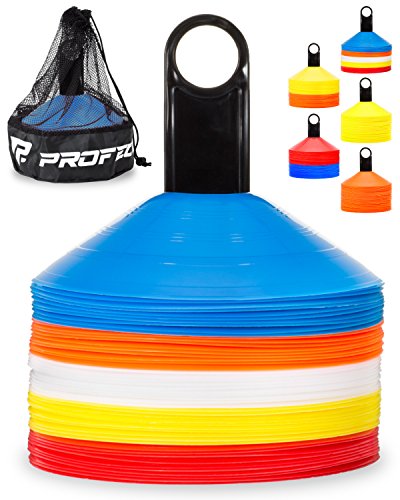
Pro Disc Cones (Set of 50) - Softball Pylons with Carry Bag and Holder for Training, Football, Kids, Sports, Field...
- Durable and flexible.
- Our long-lasting soccer cones will bounce back after getting stepped on, kicked, and run over season after season.
- Bright, easy-to-see colors with UV protection to clearly mark anything.
Hitting drills to do by yourself:
These three drills will work together to improve your hitting form so that you can hit harder and further than ever before. The best way to run these drills is one after another. The first drill will improve your form in your lower body, the second drill will improve your form in your upper body, and the final drill will put both skills together for a comprehensive hit.
Hitting Drill #1: Behind the back hitting drill.
This is a great drill to do by your self to practice the mechanics of your lower half while hitting. Start by setting up a tee, and placing your softball on top of it. Then, take your bat and hold it behind your back with two hands so that it’s at the level of your lower back, right above your bum. The barrel of the bat should be jutting out from behind your back enough so that if you rotate your torso, you can hit the ball off the tee.
Now, you’re going to do just that: hit the ball off the tee using the bat behind your back. To do so, start by loading your weight back and lifting your front leg, then drive forward while twisting so that you hit the ball off the tee as hard as possible. You should finish with your back leg up on a pointed toe.
The point of this drill is to make sure you’re really driving your bottom half. Do three rounds of this drill, hitting the ball off the tee twelve times for each round.
Here is the pretty much the highest rated batting tee of all time – this is a more premium option, there are several other high quality tees available for less:

TANNER TEE the ORIGINAL | Premium Baseball/Softball Batting Tee w/ Tanner Original Base, Patented Hand-rolled FlexTop, and Easy Height Adjustments...
- The Original pro-style Tanner batting tee that started it all. Trusted by more travel ball, youth, college and professional players than any other baseball tee, softball tee or t ball tee.
- Adjustable for All Ages: Easily adjust the height from 26" to 43" with one hand, making it perfect for players of all sizes.
Free shipping
Evan White demonstrates how to perform this drill in the YouTube video below:
Hitting Drill #2: One leg kneeling drill.
Now, we’re going to work on the mechanics of your upper body. To do this, we’re going to isolate the movement of your upper half by hitting the ball off the tee from a kneel.
Start by putting some sort of object on the ground as padding for your kneeling knee. Next, lower your tee to its lowest level so that it’s at a good height for you when you’re in your kneeling position. Make sure that the tee is not far away enough that you can hit it with your arms fully extended. Instead, you’re going to want to hit the ball off the tee with bent elbows.
Kneel down on your padding with your back leg, and stick your front leg infront of you, extended.
Begin by pulling your bat back and preparing your swing as you would normally. Your chin and cheek should be touching your back shoulder at this point. Then, swing the bat, making sure to drive with your upper half, and hit the ball off the tee. As you finish your swing, your cheek should now be touching your front shoulder. As you get used to hitting the ball like this, try doing some hits while chocking up on your bat (holding it higher up closer to the barrel).
Hitting Drill #3: Full swing off the tee drill.
Finally, we’re going to put the skills you learned in the last two drills together for a comprehensive, effective hit.
Start by putting your tee back up to normal hitting height. Then, hit the ball off the tee while practicing the lessons you learned in the previous drills.
With your bottom half you’re going to practice the technique you just learned of loading your weight back, lifting your front foot, then driving through with your weight. With your top half, you’re going to make sure you’re driving through so that your cheek connects with your back shoulder on follow through.
Putting these skills together, you should notice that you’re hitting the ball with much better form!


thanks been doing these drills during pandemic lockdown to keep in shape, first 2 are my fav